I was raised in several colonial and Victorian era homes on the New England coast and, from the moment my father first taught me how to paint our house, my summers consisted of more hours behind a brush than I care to remember.
As anyone who has scraped, sanded, primed and painted a house knows, there is no feeling more frustrating than watching your hard work peel off prematurely the following summer.
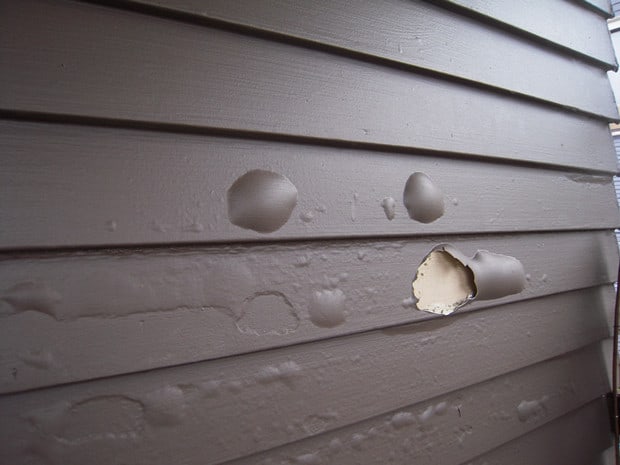
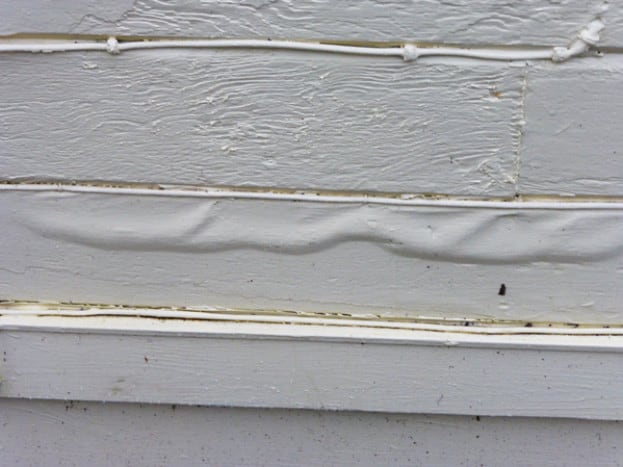
During my home inspections, I regularly see older homes that appear to have been painted recently but seem to be suffering from a premature blistering paint problem, which some people describe as paint bubbles. Sometimes you can even poke one of the blisters with a knife and water will ooze out of the pocket — an alarming moment to a prospective homebuyer.

When I see this, I like to ask my clients what they think is happening. Some of the answers I hear frequently are: The siding was not properly scraped and primed, the seller was using cheap paint or they painted in the rain without allowing the building to properly dry. While all of these causes are plausible, there is a more likely reason that often goes overlooked. To understand, let’s think about the difference between old houses and new houses.
Why is This Happening?
For the purposes of this article, an old house is any house built prior to our current energy codes – think late 1960s and earlier. These homes are not as airtight as newer homes, so there is generally more air moving through the walls. This is both good and bad. The drawbacks are heat loss and higher energy bills. The upside is that air moving through the walls helps keep the building dry. This is one of the things that makes older homes less susceptible than modern homes to rot and wood decay.

When you see blistering paint on the outside of an old house, there is a pretty good chance you are witnessing the effects of heat loss – air moving through the wall, carrying moisture in the form of vapor. This does not usually hurt your building but does create expensive and frustrating ongoing painting costs.
Renovating your home?
Find out what your home's worth, edit facts, and see the impact of home projects.
Is This a New Phenomenon?
Renovating your home?
In the old days, this was seldom a problem, for a couple of reasons. First, we used to paint our buildings with oil-based paint, which does not trap moisture as effectively as latex paint. Also, they used to fasten siding to homes using nails with rounded heads – back when siding was hand-nailed and not applied with a pneumatic nail gun. These old nailheads created a slight gap between boards – a place where moisture could escape. Today, older homes have many layers of paint and the bottom edges of the siding are sealed by successive layers of latex. The result is that there is no place for moisture from the inside to escape, so it bubbles off the finish paint in blisters.
Looking to save money on your mortgage?
How Can I Fix It?
On the outside of the house, cut open the paint on the bottom edge of the lap siding with a razor knife to let air escape. Ideally, you do this right after painting, but if your paint job has already blistered, you will need to also scrape, prime and repaint the failed areas. If the lap siding is still very tight, you can try inserting wood shims to pry open the siding and allow a place for moist air to escape. You usually do not need to do this everywhere, just where the siding is blistering.
Inside the house, be mindful of relative humidity: Try and keep the interior air dry using kitchen fans and bath fans to vent moisture outside. Aim for an indoor relative humidity below 55 percent in the cold weather months; the relative humidity can be measured with a temperature and humidity meter. If indoor relative humidity is too high, run your bath fans more frequently
More extensive air seal-up can also help. This will make the home more energy efficient as you slow heat loss through the house. This may include sealing up gaps in walls and floors to prevent air migration into the walls. This kind of work is typically done as part of an energy efficiency retrofit; local contractors who do this work can be found under energy audits or “home performance.”
I hope this helps explain an unusual phenomenon we often see when looking at houses. Remember: Knowledge is power when looking at homes. Enjoy your house hunting.
About Dylan Chalk
Dylan Chalk is the owner of Seattle-based Orca Inspection Services LLC – www.orcainspect.com. He is also the founder of ScribeWare software, offering innovative and simple report writing solutions. He can be reached at dylan@orcainspect.com. Or see his blog at http://getscribeware.com/blog.
Note: This is a guest post; the views and opinions expressed are those of the author and do not necessarily reflect the opinion or position of Redfin.


 United States
 Canada