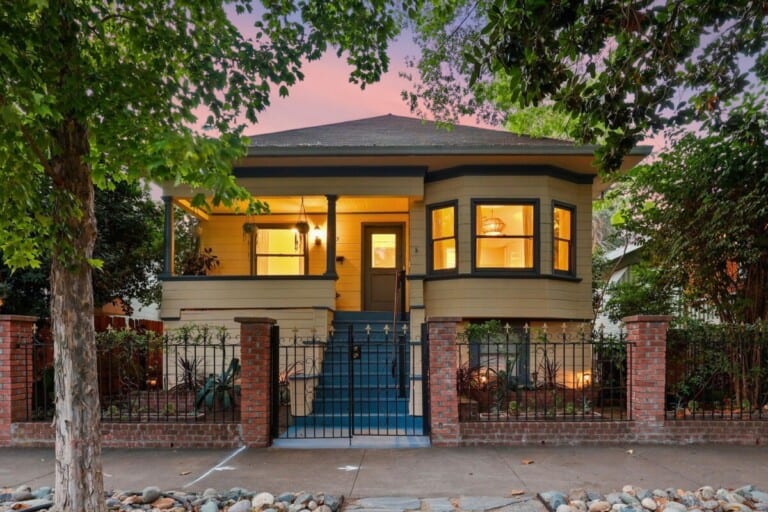
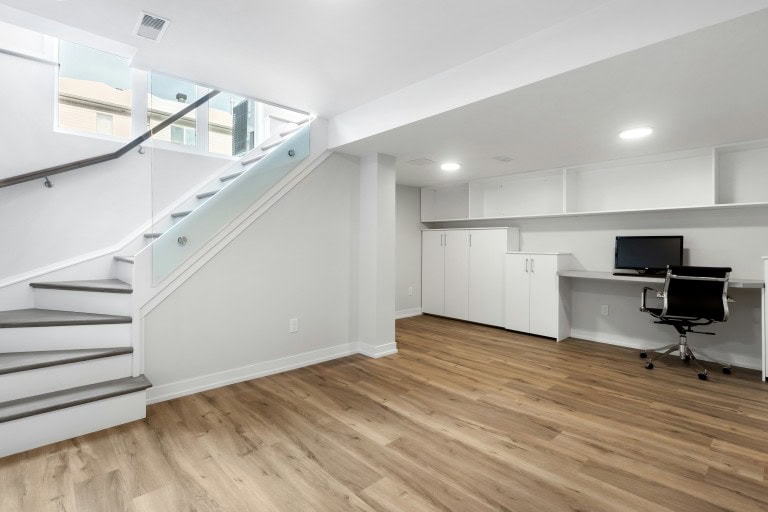
How to Install Your Own DIY Shelves

by

Reading Time: 5 minutes

I would classify my husband and myself as DIY weekend warriors. Since the day we moved in, we’ve been working room to room, making updates, decorating and tackling home improvement projects. We recently wrapped up a DIY shelving project using reclaimed wood — it may be my favorite home update yet. Like most of the projects we take on, the reclaimed wood shelves and floating mantel were trickier to install than anticipated. So I’m sharing what we learned and providing step-by-step instructions. Here’s how to install your own DIY shelves. 

Reclaimed Wood Shelves

Step 1: Assemble Your Plan

Before you do anything, make sure your wall can support a heavy, solid wood shelf. I know, I know, sounds obvious.  To support the weight of the shelf and the books you put on them, you will need to secure them directly to the wall studs. We used a stud finder that makes it easy to mark the studs.

Once you mark the studs you can figure out how you’ll support your shelves. We designed the shelves to fit our niche exactly, so we secured shelf supports on each side of the shelf to the studs. We wanted to have a floating “mantel” (in quotes because we don’t actually have a fireplace) and used special floating shelf hardware for that.

If you want to place shelves in the center of a wall rather than a niche, you can use brackets drilled directly to studs in the back wall or floating shelf hardware. Like the examples below. Keep in mind that the floating hardware only works if the shelves are not too deep or heavy.

Shelf Examples
Floating: West Elm, Bracketed: BoxyColonial.com

Step 2: Source the Reclaimed Lumber

Finding the lumber was also trickier than anticipated. We learned that lots of people want reclaimed wood. And with ten shelves and a mantel, we needed a decent amount for this project.

To find the shelving material, we explored a few options: home salvage stores, lumber yards and Craigslist ads. In the past, I’ve scored great salvaged fixtures and doors from Community Forklift and our local Habitat for Humanity ReStore in the Washington, D.C. area. You can find similar stores in most communities. Unfortunately, they didn’t have the quantity we needed. We struck out at the local lumber yards, so I turned to Craigslist. I found ‘Barn wood’, ‘reclaimed wood’, and ‘lumber’ were the best terms to weed through all of the ads and pull up relevant postings.

I got in touch with a few folks and a few emails later, I had my hands on floor joists from a friendly guy renovating an old D.C. row home.  Lucky for me, he was able to join two boards together to get the shelf depth that we needed.

If you aren’t able to find reclaimed wood, you can certainly build shelves with new lumber and achieve a similar look. Check out these tips for creating a distressed/reclaimed look with new wood.

When determining the quantity of shelving material you need, you’ll need to determine the length of the shelves and factor in any waste from cutting them to size. Be sure to get enough for the shelf supports.

Step 3: Cut the Shelves and Shelf Supports

Use a table saw to cut the shelves to the right length. To make the shelf supports, we simply took an extra piece of shelving and cut it into 2” x 2” sections.  

Step 4: Sand the Shelves and Supports

The shelves were quite rough and splintery initially. After removing any large splinters, we used a handheld sander to do a quick pass over each piece. The trick here is avoiding the urge to take it too far. If you sand too much, you’ll lose the patina and end up with wood that looks new. The rich colors and rough-hewn saw marks were the reason we sourced reclaimed lumber in the first place, so a light touch was key. After a very light sanding, we wiped down the shelves with water to remove loose dirt and sawdust. 

Step 5: Apply Lacquer and Wait.

We loved the natural patina and colors of the wood, so we decided not to stain the shelves but instead applied a clear lacquer. I wish I took photos of this step, because it was amazing how much the lacquer helped bring out the character and depth in the wood, while adding a nice shine. We used MinWax Clear Brushing Lacquer and applied it with a standard 2-inch paint brush. You can be generous with the lacquer to ensure that it penetrates the grooves of the wood. Old wood can be very dry and will soak up a lot of the initial coat. Our shelves required two coats. Be sure to let the first coat dry completely before adding the second.

Paint outdoors or in a very well-ventilated area. I recommend using a mask as the fumes are potent, even outside. Build in some time to let the shelves air out. We found the lacquer odor was still noticeable after air drying outside for several days, so you might want to plan the project over a few weekends.  

Painting
Apply lacquer in a well-ventilated area.

Step 6: Install Shelf Supports and Hang Shelves

We used painters tape to visually mark the shelf placement on our walls. The tape was a helpful guide to make sure our measurements were correct.

You’ll need a heavy duty, 4-inch wood screw to secure your brackets. The screws need to go through the support and the drywall and anchor deeply into the stud. We used a power drill to first make a pilot hole in the wood. Then we screwed the supports to the wall. Once the brackets are up, you can slide your shelves into place. We decided to just let the shelves rest on the supports without attaching them further. The shelves are heavy enough that they aren’t going anywhere and this way we can easily slide them out if we need to do a thorough dusting.

Shelf Support
2″ x 2″ shelf support, secured to the wall studs

Step 7: Install Floating Mantel

As I mentioned above, we used special hardware (like this) to install the floating mantelpiece. This hardware supports shelves up to eight inches deep and 50 pounds. The hardware came with detailed instructions, but here is the gist: anchor the 5-inch metal rods to the studs. Then drill holes into the back of the mantelpiece where you will insert the rods.

Here’s a helpful trick: Once you’ve installed the rods, put a little paint on the ends. Then hold up your mantelpiece in place and lightly press into the paint to mark where you need to drill the holes. Measure and triple check. If you’ve done this correctly, you’ll be able to slide the mantelpiece right into place. We put some wood glue in the holes for extra security.

Step 8: Style and Accessorize

This was my favorite part of the project. I consulted Pinterest and decided to loosely organize books by color. Stack books horizontally and vertically for visual interest. Add art, photos and decorative objects and rearrange to your heart’s content.

Detail

Step 9: Take a #Shelfie!

Follow Redfin on Instragram and Pinterest for home and DIY inspiration and share your projects with us. We love to see your creative ideas for turning a house into a home!

Thinking about tackling a similar project? Feel free to email me with any questions.

If you are represented by an agent, this is not a solicitation of your business. This article is for informational purposes only, and is not a substitute for professional advice from a medical provider, licensed attorney, financial advisor, or tax professional. Consumers should independently verify any agency or service mentioned will meet their needs. Learn more about our Editorial Guidelines here.
Avatar

Alina Ptaszynski

Alina writes about the real estate market in Washington, D.C. and works with media throughout the mid-Atlantic region from Virginia Beach to Philadelphia. She’s addicted to the Redfin app and loves looking at homes in random cities she’ll most likely never live. She spends her free time fixing up her fixer-upper. Redfin is a full-service real estate brokerage that uses modern technology to make clients smarter and faster. For more information about working with a Redfin real estate agent to buy or sell a home, visit our “Why Redfin?,” page.

Connect with Alina
Start your home search on Redfin
Scroll to Top