
The weather is starting to get nice outside. Want a great way to spend some time outdoors relaxing, maybe meet a few neighbors, make your yard look better and save money on organic produce? The answer is urban gardening! A recent Redfin report found that more and more homeowners across the country are putting their extra yard space to good use by planting their own urban gardens.
I know from experience that a first-time gardener can get overwhelmed with the cost and work that goes into setting up their new hobby. Here are some tips from my own experience to help you make your first garden a growing success.
Use Local Resources
Make use of local resources available to you and what you have already to get your garden started. Instead of going out and buying wood to build a new wooden garden bed, I often use large tree limbs that have fallen. I try to stick with those that are more than 8 inches in diameter, so they don’t move around and will last a bit longer. Plus then you can stray away from the square bed shape.
Talk to Other Gardeners
Get prepared and try to talk to your other fellow gardeners. A great way to do this is to host a local seed and plant swap. The host always leaves with the best stuff! Or, find your local garden group and see when the next meeting is. You may find out that a seed and plant swap is already planned. Getting seeds from local gardeners assures that the varieties have already been tried and have been a success in your area. Seed and plant swaps means you don’t have to spend a lot of money on seeds, and usually the seeds shared are fresh!
Figure Out How Much Space You Need
Once you have your seeds and plants, try to find out how big they are going to get so you create a plan.
There are so many different ways to plant a garden. Here’s what I do when I plant a new garden bed:
- I don’t dig up the soil (there are important benefits in the top 8 inches of soils, no matter how crappy the soil is). I try to stay away from plastic liners, because I don’t want plastic in my soil or food. Instead, I lay down a thick layer of newspaper (4-8 pages) over the grass or weeds, making sure to overlap by at least four inches, so the weeds can’t sneak up.
- Lay down cardboard and mulch over where you will be walking.
- Place your new garden borders down. Walk around and make sure you’ve chosen a good spot in your yard. Some things to consider are: how much sunlight the spot gets, whether or not you can reach it with a hose and drainage. Take a walk and make sure it looks good from the street too.
Get Your Garden Beds Prepped
Now what goes into your new beds? This is what I do:
- Add two to three inches of leaves or grass clippings, more newspaper, dirt and composted mulch. Tree companies will be HAPPY to dump a whole truckload of mulch for you! Just call a local one.
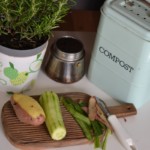
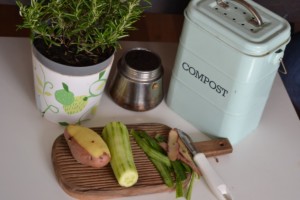
- Next, add any organic fertilizers. My top recommendations are Azomite, apple cider vinegar, black strap molasses, Epsom salts, rabbit poop, goat poop and fish parts. Then you’ll add compost (If you haven’t started composting, you should start now!). Call your local county municipal dept., they might be composting already and you can probably get it from them for cheap.
- Add some worms, a final layer of newspaper as a final weed barrier and the final step is more mulch. Mulch looks great, keeps the newspaper down and will break down into more great soil.
- To plant your new plants, move the mulch aside and dig a little spot in the newspaper.
- Water your new plants once a day for the first 2 weeks, then twice a week is fine until they are established. Don’t forget to add marigolds to the mix. They help keep away pests. Reading up on companion gardening is a great way to find out how plants can help or hurt each other.
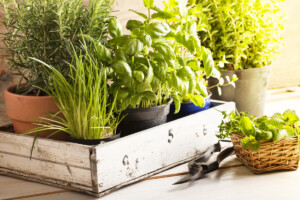
My favorite plants are those that give back to the soil. Most Perennial plants have an invested interest in the soil, so I try to choose edible perennials. When you realize how amazing it is to grow your own food, you will want to edible landscape your whole yard!
For those of us who garden already, looking into edible landscaping is the next step. In my yard, I plant only fruiting or edible trees, bushes and plants. They are just as beneficial as ornamental plants and useful too! Some of my favorite Zone 9 Perennials to start with are lemongrass, rosemary, blueberries, mint, Dawn Dewa, Jewels of Opar, Daylily Fulva, chaya, Cuban oregano, green onions, asparagus, ginger and pineapples.
Also, find out which native plants and trees are edible. Planting a native garden makes for easy upkeep. You already know it will survive in your zone. In my Tampa home, I plant lots of native edibles including Everglade tomatoes, Seminole pumpkins, passion fruit vine, porterweed, rattlesnake weed, purslane, sea purslane, peppergrass, wild mustard and dandelions.
If you don’t have space for your own home garden, local community gardens are an amazing resource! It seems that each town has at least one in local parks, libraries or at schools. The Tampa area has been starting to plant community orchards with fruit trees and bushes that are free to whoever wants to harvest them. Community investing in community!
Good luck and happy gardening!


 United States
 Canada