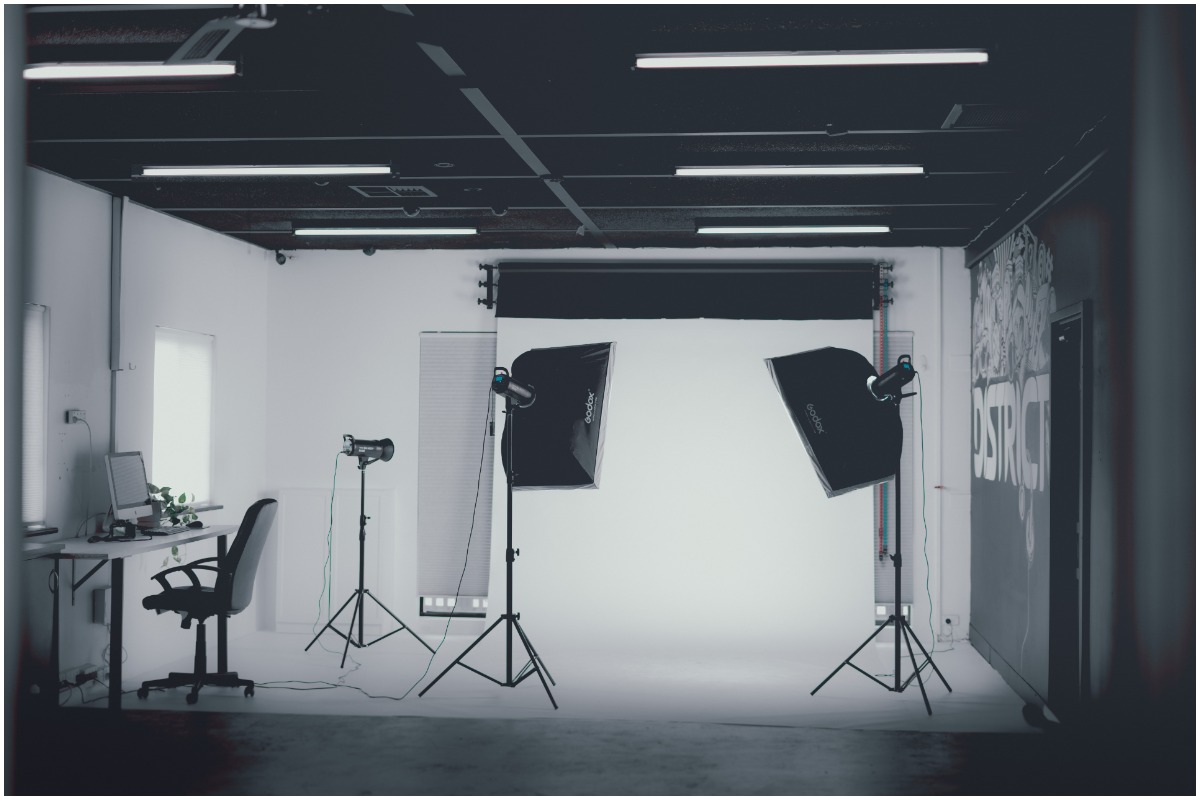
Creating a photography studio at home has countless benefits for photographers of all skill levels. Beginners can use the space to practice manipulating different kinds of lighting or trying out new camera lenses, while professionals can utilize the space to photograph clients in the comfort of their own homes.
To help you create the perfect studio, we reached out to photography experts from Long Island, NY to Oklahoma City, OK, to share their best tips for creating a home photography studio. From what paint colors to choose to how to keep your studio flexible, keep reading to see what they had to say.

1) Get creative with props, supplies, and backgrounds
Any room in your home can be used for a studio. A bedroom, living room, office space, basement, or garage will do. If you have natural light, great. If not, use a speed light or a strobe unit with a softbox. Also, don’t spend too much on props and supplies. Depending on what genre you plan on photographing, you’ll only need a background or two, a chair, and a reflector. Most importantly, price yourself for success and profitability from the start. – Irene Keselman from Irene Keselman Photography
2) Utilize the items you have at home
Many items around the house can act as great sources of light or backgrounds. For example, a simple sheet of A4 paper can serve as a background when photographing objects for online selling. Get creative and use what you can see around you to picture something remarkable and unique – Lencarta
3) Paint the walls white
When setting up your home photography studio, consider painting your walls white. If you’re on a budget, take advantage of natural light as your light source in your home studio. Always make sure your setup is next to your window (light source) or directly in front of the window. White walls allow natural sunlight to bounce off the walls and back onto your subject, a great and easy way to bounce light onto your subjects that acts as a reflector. – Tamera Darden, Founder and Lead Photographer of Darden Creative
4) Use a curtain pole as a backdrop stand
Instead of buying backdrop stands, get a curtain pole. Hanging a rail with just two hooks on your wall is less intrusive to the interior design of your beautiful home – and you’ll save a lot of space. When you finish a photoshoot, all you have to do is roll up the backdrop. Plus, the space will look super tidy – no need to create a mess when getting creative at home. – Laura BC
5) Be in control of your camera and lighting
If you have a camera and light, you can do anything. The more control you have over both, the more creative you can get in any space. Learn how to really use your camera, get a good lens, a solid tripod, and learn editing software like Lightroom, Photoshop, or Capture One. When it comes to lighting, setting up near a window is a good place to start, but I highly recommend learning how to use artificial light. Your light becomes your “window,” and you can move around to different areas and create any type of light you want with different modifiers. Keep practicing, and your home studio space will evolve as you do. – Regan Baroni Photography
6) Set up your studio in your garage
It’s entirely possible to create a studio in a garage or spare room. Garages are great because they allow a lot of natural indirect light (which is the best kind) and reduce the need to use or buy external lights. If natural light isn’t available, using a flash or two positioned away from the camera can provide good light inside or after dark. – OKKat Photography
7) Turn off overhead lights
Use the natural light in your home. Turn off all overhead lights and lamps, then position your subject near a window for flattering natural lighting. If you’re photographing a baby, laying them on a white blanket creates a great neutral background and keeps all of the focus on your adorable baby. – Beth Miga Photography
8) Take note of the direction your windows face
Light is everything when it comes to photography, so try to find a place in your house with good natural light. Large windows or doors which are north or south-facing (depending on where you are in the world) are perfect for this. East or west-facing windows can also work but can be more restrictive on when you get the best light, so pay attention to when you get great light coming in and try to shoot at that time of day. – Tracey Jones Photography
9) Keep your space flexible
When designing your home photography studio, consider all aspects of the space that will affect the light. I recommend keeping the walls white to help maintain the accuracy of color and flexibility of style. Also, try to avoid using built-in overhead lighting. It’s a good idea to invest in a couple of studio lights and stands to give you control over highlights, shadows, and reflections, as well as how warm or cool the color translates in the camera. – Range Photography Studio

10) Soften the light source
Nothing will do more to improve your portraits than to soften the light. Hang up a white sheet or large piece of white or frosted plastic (like a painter’s drop cloth) midway between the light source and the subject. – Macbeth Studio
11) Invest in a wall-mounted backdrop system
Often in a home studio, usable space is few and far between. Backdrop stands tend to take up a large amount of space when in use, so to combat this problem, invest in a wall-mounted backdrop system. Not only will you save all of that floor space, but depending on the system you purchase, you can hang up to 4 different backdrops and have them ready to go at a moment’s notice. – Long Island Photography Studio
12) Use natural lighting when possible
Look for homes with large pane windows or build a house with a room with one complete wall of large pane windows. Natural light provides excellent photography lighting conditions for professional to amateur photographers alike. Using natural light takes off the pressure to purchase extra lighting gear and makes your subject feel more at ease. – Bobbi Jo Brooks-Tom of Bobbi Jo Brooks Fine Art & Photography, LLC | Atlanta, GA
13) Design a space designated for creativity and have great customer service
When creating art from the comfort of your home, there are three essential factors that make a fantastic home studio. First, provide a consistent light source, whether natural or studio lights, perhaps even both. By providing consistent lighting, your images reflect your vision. Secondly, design a space designated for creativity and take your time to decide on your style. Finally, don’t forget the importance of customer service. Even if you’re working from home, your studio is still your creative corner. Customer service is essential because it’s the best way to promote word-of-mouth referrals for your home photography business. Impeccable service also creates a superior business plan and builds successful, long-lasting relationships with your clients. – Sarah Borchgrevink Photography
14) Add character with different styles and textures
Take the difficult route to add character to your studio. It’s beneficial to have a blank slate studio (bare white or black walls) that can be modified to fit different needs but don’t forget about your passions, your style, and the textures that you love. – Connecticut Photography Studio
15) Control unwanted light
It’s great to have access to large windows and doors for natural light in a home studio. However, as nice as it is, sometimes the light becomes too intense. Make sure to have shears and light-blocking or opaque curtains to block out any unwanted light. Many times, it’s more beneficial to control the look and feel of the shot with your own artificial lighting. – Studio 141
16) Keep your space clutter-free
Focus on texture and neutral colors when designing a set, so the environment is complementary and not distracting. And details are important – hide any electrical cords and visible labels, straighten up the pillows, curtains, and other accessories. It’s much easier to make these adjustments before the photo is taken than to try and fix something in post-production. – Mararamiro Home + Studio
17) Make the space comfortable
Your studio needs to be your center of inspiration, so set everything up the way you feel most inspiring. Secondly, invest in a solid working desk and a comfortable supporting chair for pleasurable working hours. Finally, consider using two sources of light – one that illuminates the person, and the other one, such as an LED strip, lights the background. – GleFotka Studio
18) When possible, plan your shoots around the weather
It’s absolutely essential in my creative process to find the natural light. Mid-morning in my home studio is the magic hour for me. The light shines the strongest in this little corner of the apartment. Once you’ve found the best light in the house, consistently check a weather app to plan the best days to shoot. This makes batch work a breeze, even for a natural light photographer like me. If you have a difficult time finding strong rays of sunlight, especially in the winter months, no worries. Open the blinds, use bright studio paper and even a reflector to capture that magical light that fits your style. – Halley N. Hewitt Photography

 United States
 Canada